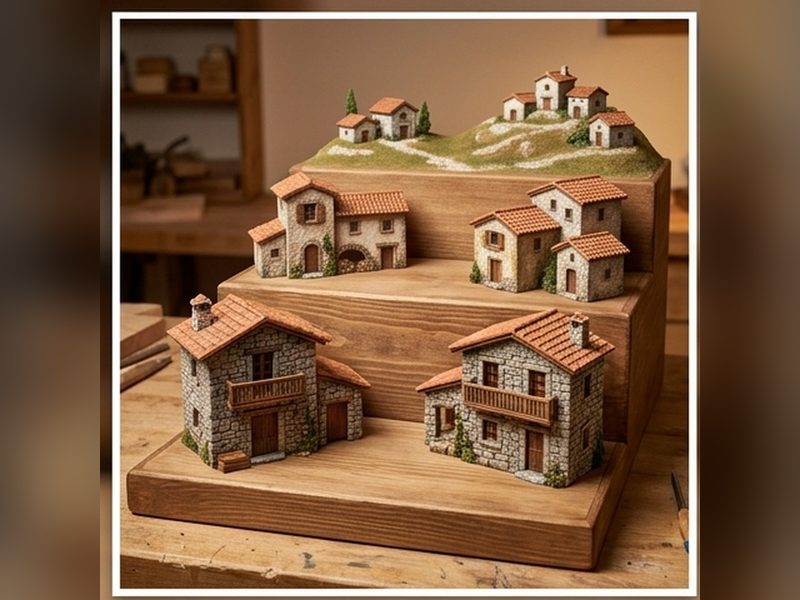
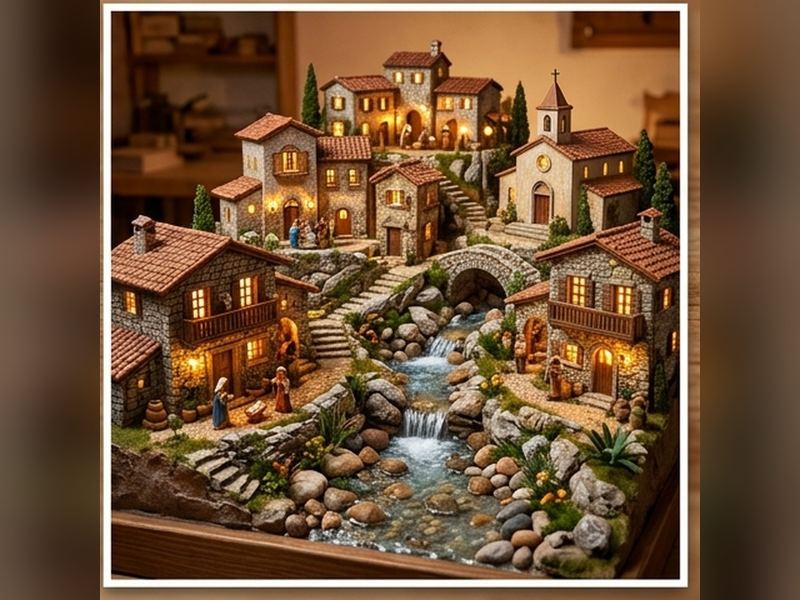
The secret that turns a 24-inch-deep tabletop into a sweeping mountain valley in a traditional Italian Presepe (Nativity diorama) or Christmas village is forced perspective scaling. By dividing the base into three stepped tiers—a Foreground plane with 10–12 cm (4.5 in) figures, a Midground village with 6–7 cm (2.7 in) figures, and a Background ridge with 3.5–4 cm (1.5 in) miniature houses—and carving lightweight XPS extruded polystyrene foam brushed with plaster and ochre earth pigments, you achieve museum-grade depth and realism at home.
🎄 Interactive Holiday Calculator & Simulator
🎄 INTERACTIVE CHRISTMAS SIMULATOR & CALCULATOR
Nativity Scene Forced-Perspective Scaling Calculator (Foreground, Midground & Background)
Explore the 4 practical scenarios, translate technical units into everyday comparisons, or calculate exact figures for your setup.
📏 Practical Everyday Comparison
Traditional Neapolitan Presepe masters follow a strict proportion rule: a building’s doorway height should equal 1.35x the height of the figures on that plane (for 12 cm foreground figures, doorways should stand ~16 cm tall and single-story cottages ~22 cm high).
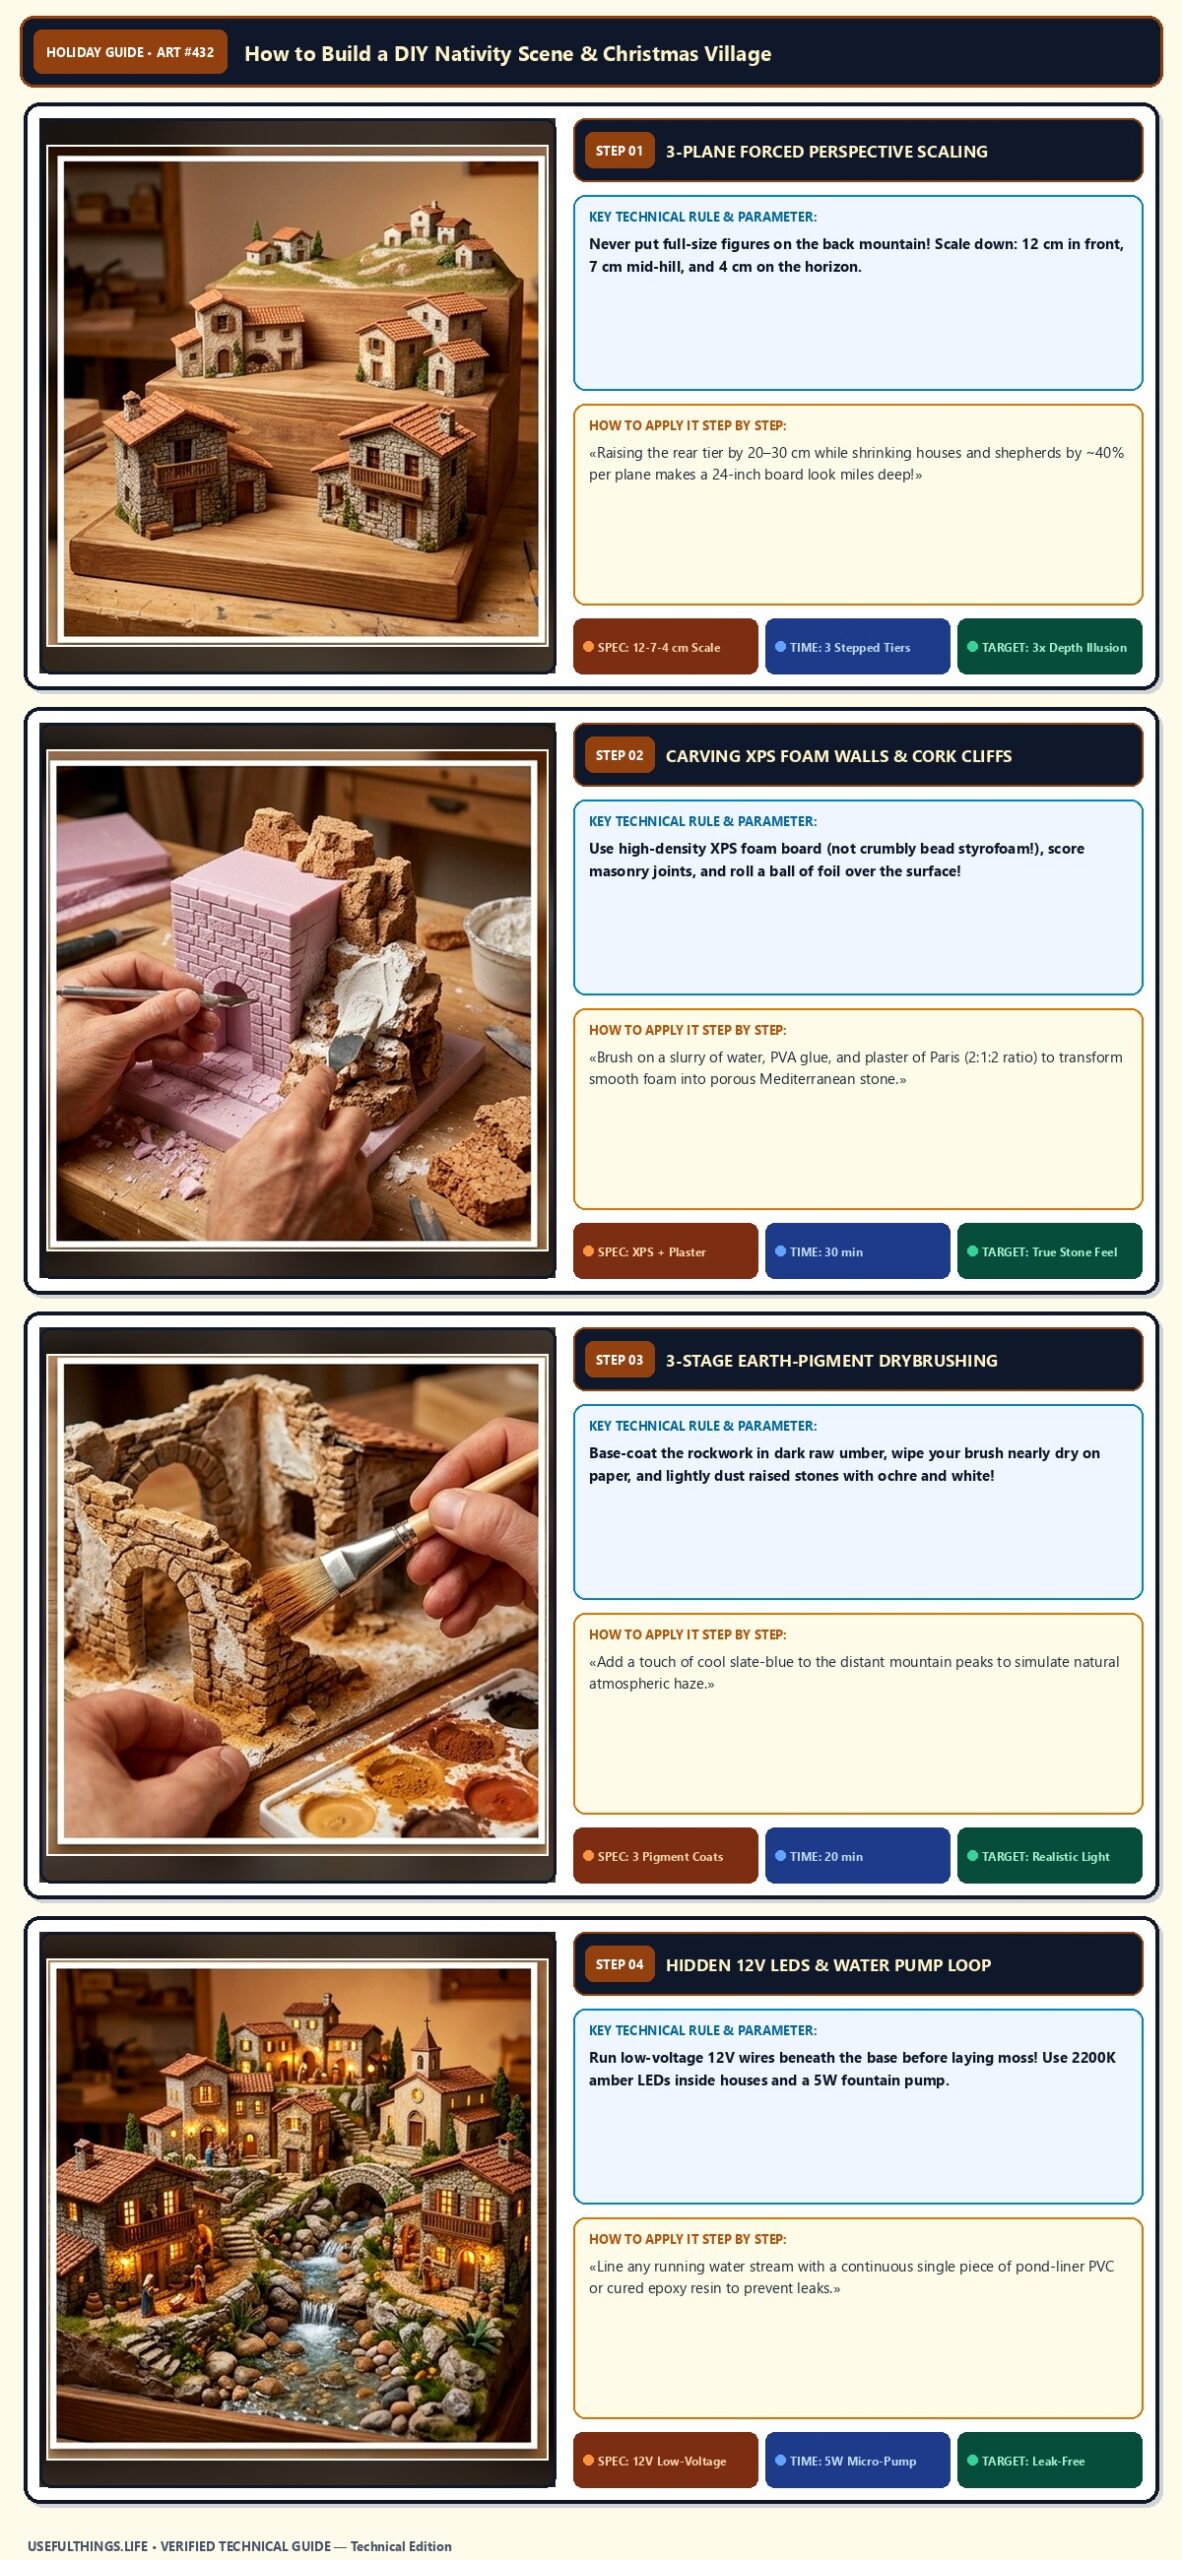
🎄 4-Step Holiday Technical Protocol — How to Build a DIY Nativity Scene & Christmas Village4-STEP GUIDE #432
1. 3-Plane Forced Perspective Scaling
📐 Technical Rule: Never put full-size figures on the back mountain! Scale down: 12 cm in front, 7 cm mid-hill, and 4 cm on the horizon.
✅ Recommended Action: Raising the rear tier by 20–30 cm while shrinking houses and shepherds by ~40% per plane makes a 24-inch board look miles deep!
🎯 12-7-4 cm Scale📏 3 Stepped Tiers✨ 3x Depth Illusion
2. Carving XPS Foam Walls & Cork Cliffs
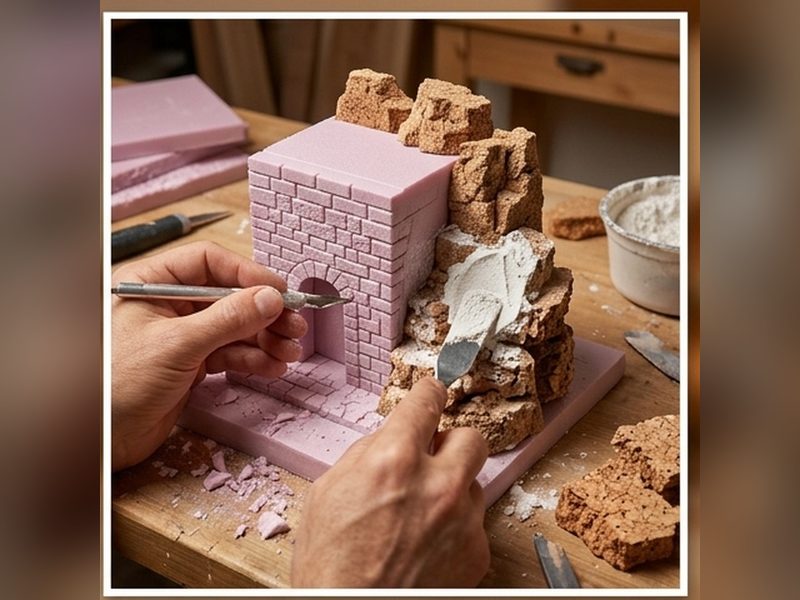
📐 Technical Rule: Use high-density XPS foam board (not crumbly bead styrofoam!), score masonry joints, and roll a ball of foil over the surface!
✅ Recommended Action: Brush on a slurry of water, PVA glue, and plaster of Paris (2:1:2 ratio) to transform smooth foam into porous Mediterranean stone.
🎯 XPS + Plaster📏 30 min✨ True Stone Feel
3. 3-Stage Earth-Pigment Drybrushing
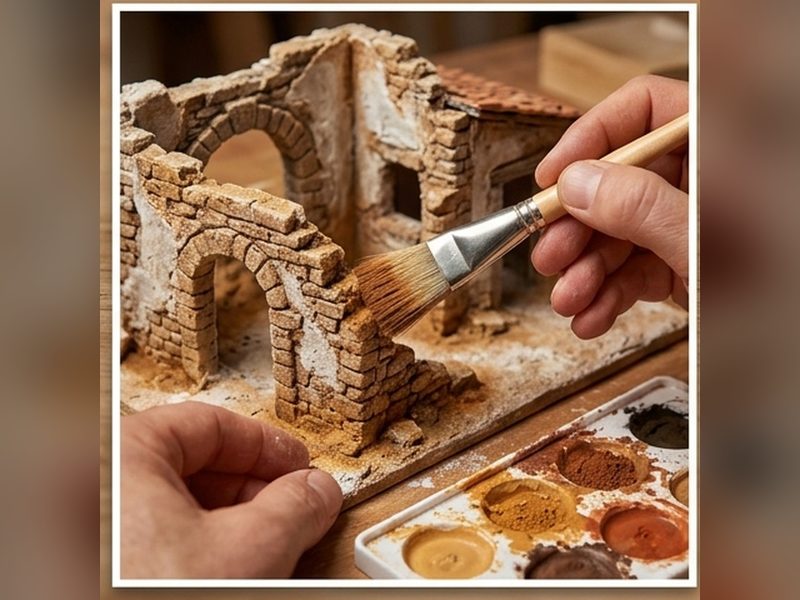
📐 Technical Rule: Base-coat the rockwork in dark raw umber, wipe your brush nearly dry on paper, and lightly dust raised stones with ochre and white!
✅ Recommended Action: Add a touch of cool slate-blue to the distant mountain peaks to simulate natural atmospheric haze.
🎯 3 Pigment Coats📏 20 min✨ Realistic Light
4. Hidden 12V LEDs & Water Pump Loop
📐 Technical Rule: Run low-voltage 12V wires beneath the base before laying moss! Use 2200K amber LEDs inside houses and a 5W fountain pump.
✅ Recommended Action: Line any running water stream with a continuous single piece of pond-liner PVC or cured epoxy resin to prevent leaks.
🎯 12V Low-Voltage📏 5W Micro-Pump✨ Leak-Free
🎨 4-Panel Illustrated Step-by-Step Storyboard
How to Build a DIY Nativity Scene & Christmas Village: Forced Perspective Scaling, Foam/Cork Rockwork & Day-Night LED Wiring — 4-Panel Illustrated Technical Storyboard & Key Metrics.
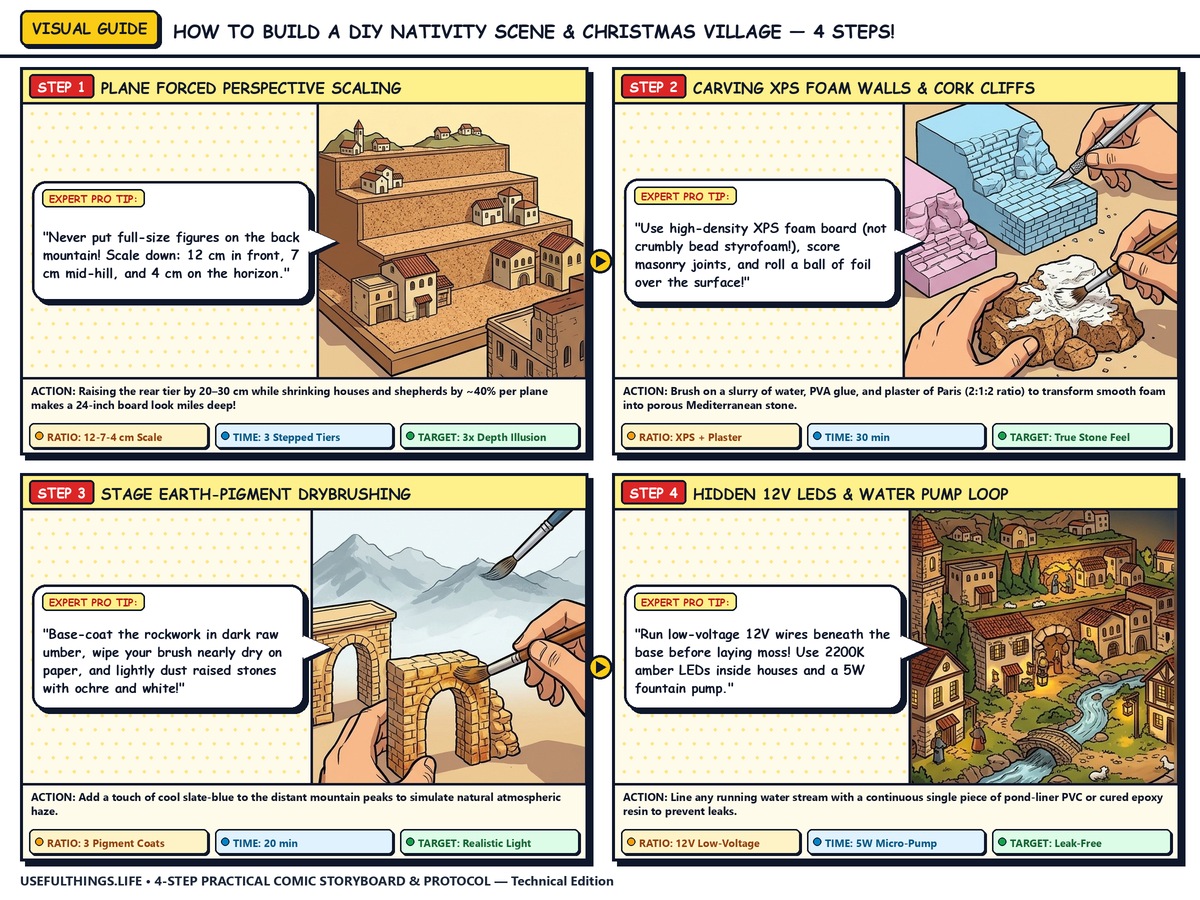
🎨 4-Panel Practical Comic Storyboard Guide — How to Build a DIY Nativity Scene & Christmas Village4-STEP COMIC STORYBOARD #432
1. 3-Plane Forced Perspective Scaling
🛠️ Expert Pro Tip: «Never put full-size figures on the back mountain! Scale down: 12 cm in front, 7 cm mid-hill, and 4 cm on the horizon.»
Raising the rear tier by 20–30 cm while shrinking houses and shepherds by ~40% per plane makes a 24-inch board look miles deep!
⚖️ 12-7-4 cm Scale⏱️ 3 Stepped Tiers🔬 3x Depth Illusion
2. Carving XPS Foam Walls & Cork Cliffs
🛠️ Expert Pro Tip: «Use high-density XPS foam board (not crumbly bead styrofoam!), score masonry joints, and roll a ball of foil over the surface!»
Brush on a slurry of water, PVA glue, and plaster of Paris (2:1:2 ratio) to transform smooth foam into porous Mediterranean stone.
⚖️ XPS + Plaster⏱️ 30 min🔬 True Stone Feel
3. 3-Stage Earth-Pigment Drybrushing
🛠️ Expert Pro Tip: «Base-coat the rockwork in dark raw umber, wipe your brush nearly dry on paper, and lightly dust raised stones with ochre and white!»
Add a touch of cool slate-blue to the distant mountain peaks to simulate natural atmospheric haze.
⚖️ 3 Pigment Coats⏱️ 20 min🔬 Realistic Light
4. Hidden 12V LEDs & Water Pump Loop
🛠️ Expert Pro Tip: «Run low-voltage 12V wires beneath the base before laying moss! Use 2200K amber LEDs inside houses and a 5W fountain pump.»
Line any running water stream with a continuous single piece of pond-liner PVC or cured epoxy resin to prevent leaks.
⚖️ 12V Low-Voltage⏱️ 5W Micro-Pump🔬 Leak-Free
📊 Technical Comparison Table, Key Parameters & Myths to Avoid
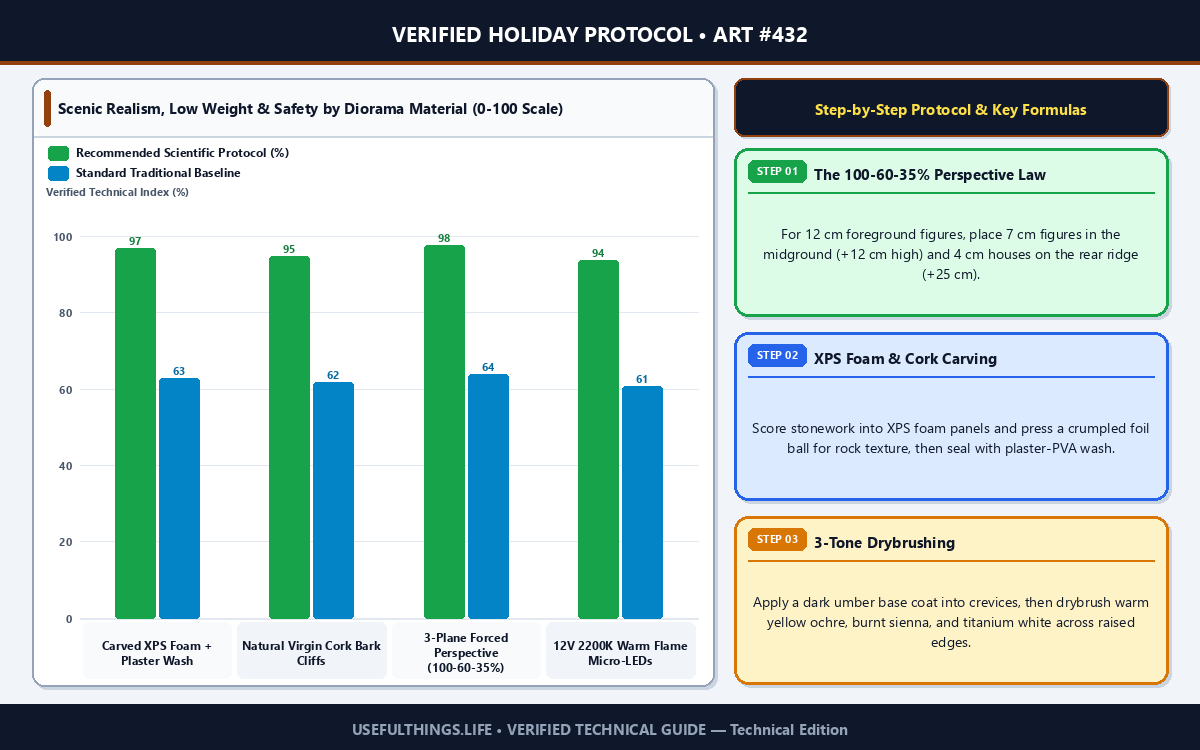
How to Build a DIY Nativity Scene & Christmas Village: Forced Perspective Scaling, Foam/Cork Rockwork & Day-Night LED Wiring — Scientific Parameter Chart & 3-Step Protocol.
Desaturated slate-grey & pale blue wash (aerial haze)
🔬 Deep-Dive Rules, Scientific Secrets & Mistakes to Avoid
STRUCTURAL FOAM SCIENCE
1. Extruded Polystyrene (XPS) vs. Bead Styrofoam (EPS): Why XPS Is Mandatory for Carving
CLOSED-CELL XPSZERO MESSY BEADSHOLDS FINE DETAIL
Never use white packaging styrofoam (EPS)—it crumbles into static-charged beads and cannot hold carved brick lines. Pick up a 1-inch sheet of Extruded Polystyrene insulation board (XPS, pink, blue, or yellow rigid foam) from any hardware store: its dense closed-cell grain carves cleanly with a hobby knife and takes stone texture from a ball of aluminum foil.
AERIAL PERSPECTIVE
2. Leonardo da Vinci's Atmospheric Haze Trick for Distant Mountain Ridges
Distant mountains appear cooler and paler due to atmospheric scattering. Mix a touch of ultramarine blue and titanium white into the grey drybrush on your rear mountain tier, and light the sky backdrop from below with a diffused LED strip—never aim spotlights straight at the back wall or you will cast giant shadows of shepherds across the sky!
❌ ELECTRICAL & FIRE SAFETY
3. Moss, Paper Rock & Water Pumps: Why 5V/12V Low-Voltage LEDs Are Non-Negotiable
❌ NO 120V/230V HOT BULBSCOOL 5V/12V MICRO-LEDSSEPARATE PUMP CIRCUIT
Tucking old line-voltage incandescent bulbs inside paper-mâché caves or dry moss is a serious holiday fire hazard. Power all house windows, campfires, and star effects exclusively with 5V USB or 12V DC Micro-LEDs, which generate zero heat even when buried under cork and lichen.
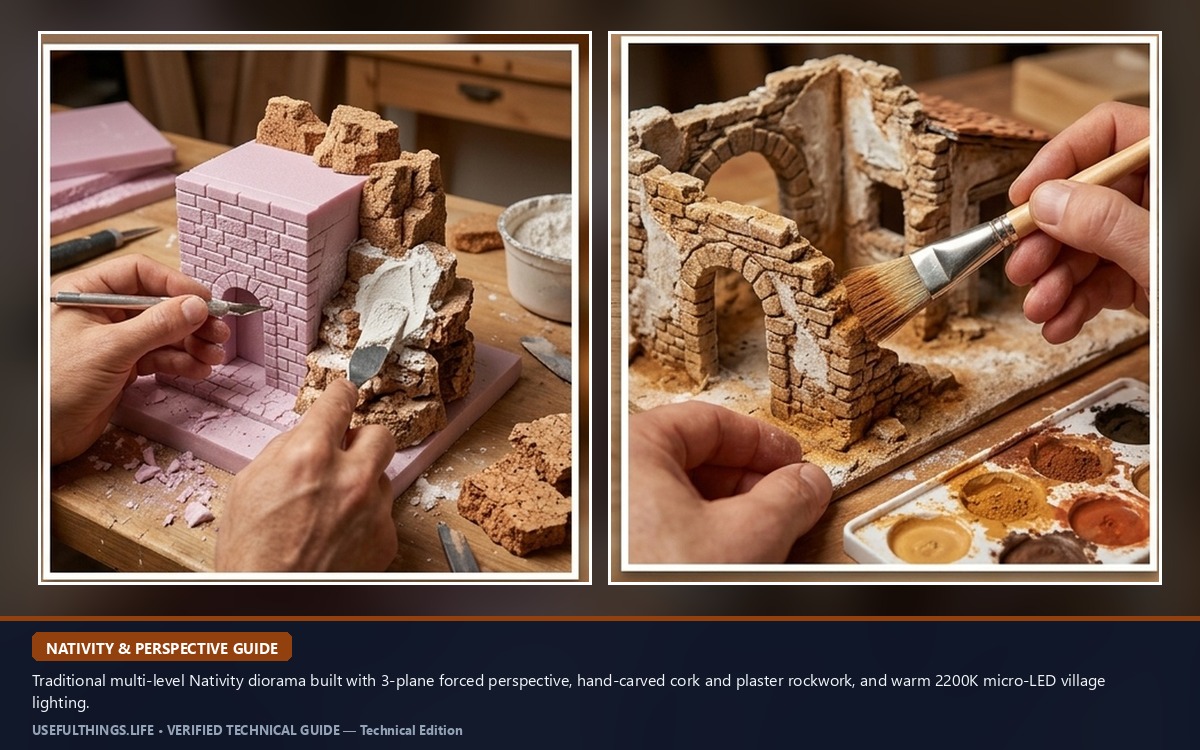
Traditional multi-level Nativity diorama built with 3-plane forced perspective, hand-carved cork and plaster rockwork, and warm 2200K micro-LED village lighting.
✅ Best Practices (Do’s) vs ❌ Common Pitfalls (Don’ts)
✅ Verified Golden Rules
Combining natural virgin cork bark for foreground cliffs with carved XPS foam for village houses gives the best balance of realism and light weight.
Sifting real sand, crushed terracotta, and dried coffee grounds over diluted PVA glue creates lifelike cobbled paths and dirt roads.
Simulating streams with clear glossy acrylic gel medium or UV resin avoids water evaporation and pump maintenance.
❌ Myths & Mistakes to Avoid
Mistake to avoid: Spraying solvent-based aerosol paint directly onto bare XPS foam—propellants melt polystyrene instantly; always seal with water-based PVA/plaster or use acrylics.
Mistake to avoid: Using kitchen flour for snow (it attracts pantry pests and turns gummy); use baking soda or fine marble/quartz snow powder instead.
💬 Frequently Asked Questions (FAQ)
❓ How do I calculate the right figurine sizes for a 3-tier forced-perspective Nativity?
Multiply your foreground figure height by 0.60 for the middle tier and 0.35 for the background ridge. For 12 cm (4.7 in) foreground figures, use 7 cm (2.7 in) figures in the midground and 4 cm (1.5 in) figures in the distance.
❓ Why did spray paint melt my foam Nativity mountains?
Aerosol propellants and solvent-based glues dissolve polystyrene on contact. Always seal XPS foam first with a water-based PVA glue and plaster wash and paint exclusively with water-based acrylics.
❓ What is the best material for realistic snow on a Christmas village?
Dust a mixture of baking soda (sodium bicarbonate) and fine iridescent mica or marble dust over a misted coat of matte acrylic medium—never use food flour.
🔗 Related Guides & Calculators on UsefulThings.life




Leave a Reply